Finding the right pro for water lines, fixtures, and drains hinges on quality and risk control from day one. Set expectations upfront, and you cut hidden delays and budget drift. Map the scope, document photos, and collect appliance model numbers or valve types before anyone touches a wrench. This careful start reduces change-orders and protects your warranty. We’ll walk through scoping, materials, scheduling, quality safeguards, and trade-offs so your job runs smooth. Learn how to confirm parts availability, stage tasks around your household, and plan for inspections. You’ll spot the tells of solid craftsmanship versus guesswork. By the end, you’ll be ready to ask pointed questions, weigh options, and keep the work clean, safe, and on time.
Map Project Scope early and flag risks before tools come out
Start with a room-by-room checklist that notes fixture count, shutoff access, pipe materials, and visible corrosion; add clear photos from different angles. Gather serial numbers for heaters and appliances, note supply line sizes, and list ceiling or wall finishes that might get opened. "plumber" Build a simple milestone plan that covers shutoffs, testing, and any permit inspections so everyone sees the sequence. Agree on test results you expect, like pressure stability and no visible seepage. This prep helps the crew order parts once, arrive ready, and avoid return trips.
Create a risk log with common pitfalls: hidden galvanized behind tile, slow drains indicating vent issues, or attic piping exposed to temperature swings. Assign a response for each risk, like borescope checks or isolation tests. In a condo, coordinate elevator access and protection for shared hallways; in a shop, plan off-hours work to limit downtime. Ask who signs off at each step and how changes get priced to keep decisions quick and documented. When the plan is visible, surprises shrink and accountability rises.
Choose code-compliant materials and compatible parts for the environment
List every fitting, valve, trap, and connector by type and size, then confirm ratings for temperature and pressure. For example, specify quarter-turn ball valves where frequent shutoffs happen, and use full-port where flow matters. Confirm that expansion tanks match heater capacity, and that fixtures meet water-efficient standards without starving performance. Gather warranty details and lead times for specialty cartridges or pressure-balancing valves.
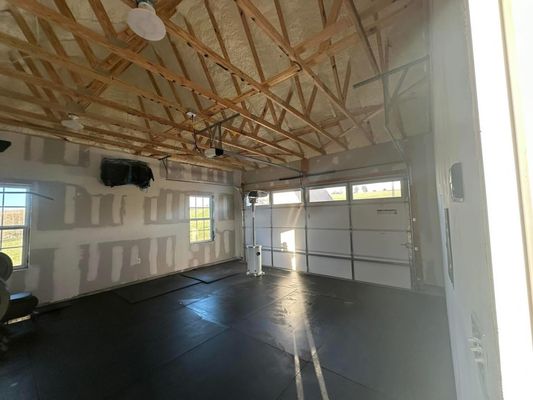
Check for chemical exposure in garages or shops and pick materials that resist it, like certain elastomers for gaskets. Coordinate wall thickness and finish depth so trim kits sit flush after tile or paneling goes on. Verify dielectrics on copper-to-steel transitions to prevent galvanic issues, and label cleanouts for easy servicing. Right materials paired to site conditions stop callbacks and slow leaks. On older homes, confirm vent sizing and slope before adding new fixtures to avoid sluggish drains.
Stage the workflow logically and schedule tasks to minimize household downtime
Break the job into crisp phases: isolate, demo, rough-in, pressure-test, set fixtures, and final test. Confirm water outage windows that fit family routines or business hours, and post them on the fridge or office board. Coordinate delivery of long-lead parts so they arrive just before the rough-in phase "sewer repair" and store small components in labeled bins by room. Color-code tape or tags so everyone knows which valves and lines tie to each area. Pad the schedule with a brief buffer before inspections to catch tiny fixes without panic.
During multi-room work, keep one bathroom operational when possible, swapping fixtures in stages. If ceiling cuts are required, protect floors and furniture with runners and clean daily. Share daily check-ins by text with quick photos of progress and any found issues. Confirm who restores surfaces and paint, and whether that falls under your crew or another trade. By sequencing tasks and communication, the site stays safe, tidy, and predictable.
Build a repeatable quality process and control failure risks at each step
Adopt a test-first mindset: pressure-test new lines, fill and drain fixtures, and inspect every joint under bright light before closing walls. Use torque specs on supply connectors and replace worn washers instead of overtightening. Document readings with a quick snapshot of gauges and keep a log of verified joints per room. Bake in a second-person check on critical connections, especially gas and heater tie-ins. These small rituals prevent drips that hide until drywall stains weeks later.
If drains gurgle or back up, run a camera to confirm slope, obstructions, or root intrusion, then map findings to the plan. Reserve time for thorough sewer repair if the video shows cracks, offsets, or build-up that tools alone won’t fix. Align with inspection requirements, and keep cleanouts clearly accessible for retests "plumber" when needed. Finish with a whole-home walkthrough: feel each shutoff, watch gauges settle, and listen for odd sounds. A quality process turns unknowns into data and data into confident decisions.
Balance cost realities with lifecycle value and smart trade-offs
Start with a good-better-best options sheet that compares parts, warranty length, water efficiency, and expected maintenance. Flag where a small upgrade pays back, like brass stops instead of plastic in high-use rooms. Compare labor hours for repairs versus targeted replacements when parts are obsolete or brittle. Track energy, water, and service savings across a few years. Keep a contingency line for surprises that testing might reveal.
Use clear pricing for discovery work, such as opening a small section to inspect a riser before committing to larger changes. Offer alternates when supply chains delay a specific fixture finish or cartridge. For a rental, prioritize durable finishes and tamper-resistant parts to lower service calls. In a retail space, schedule noisy work off-hours and account for staff coordination. Decide where you want the single use of plumber documented in writing so scopes and expectations remain unambiguous plumber across the entire job.
Coordinate with tenants and teams for smooth approvals and cleanup
Share a simple daily plan: when water is off, which rooms are active, and what protection will be in place. Collect gate codes, pet details, parking info, and elevator schedules in one message thread. Agree on a photo handoff every afternoon, showing clean floors, covered finishes, and labeled valves. Set one point of contact to approve small field decisions. A clear routine keeps trust high and stress down.
In multi-tenant buildings, post notices at least 48 hours ahead and include outage windows plus a contact number. For commercial sites, coordinate key-holder arrival, restroom access for crews, and waste disposal locations Plumber near me to avoid confusion. End each day with a mini punch list and a five-minute call. Set expectations for debris hauling and surface patching, and track them to a simple checklist. With steady updates and tidy spaces, the work feels organized and respectful.
Conclusion: You now have a roadmap that blends scope clarity, right-fit materials, a tight schedule, rigorous testing, and thoughtful budgeting. Quality-focused routines keep surprises small and results dependable. Align expectations early, verify parts and access, and document each milestone so the project moves without friction. With these habits, even complex jobs stay safe, efficient, and built to last.